Tutorial - Entering a simple record
Watch the video below which shows you the steps required to input a minimalistic record into iRecord. Then follow the steps given further down the page to have a go at inputting a record yourself.
A wildlife recording system is nothing without the records it contains, so what better way to start learning iRecord than to input a simple record. The exact information you might want to record will depend on what you are recording and why you are recording it, but most agree that all biological records need to include the following information:
- Who recorded it
- Where it was recorded
- When it was recorded
- What was recorded
We will normally be logged in to iRecord when we input records, so the system already knows who you are and can use this information to provide the default value for “who recorded it”. iRecord includes a limited number of ways of inputting records even when you are not logged into the system but in these cases you would be asked to fill in basic details of yourself. As iRecord is far more useful when logged in, we’ll be focusing on inputting data as a logged in user. The other key parts of a record, the “where, when and what” will need to be input when you add a record to the system.
Tip
When practicing using iRecord to input records, if you want to input data that are not real make sure you turn on the training option in your user profile. More information on using the training option or watch how to do this this on YouTube.
To add a record:
First make sure you are logged in.
Select Record > Enter a casual record from the main menu. This takes you to the form which you will fill in for general ad-hoc records. There are other forms for lists of records as well as forms catering for specific surveys, species groups and places which we will learn about later. The top half of this form allows you to set most details of the record other than the locality information, which we will come to in a moment.
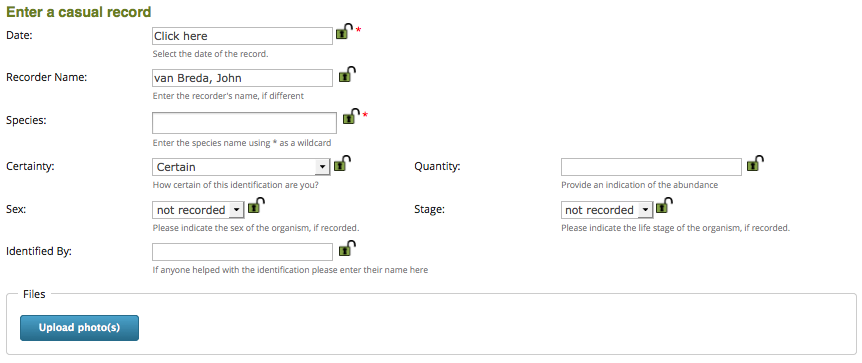
For this tutorial. we’re going to input the very minimal details required for a record. Click in the box beside the Date label and you will see that a calendar panel pops down making it really easy to simply click on the correct date. If you need previous months or years then you can use the controls at the top of the panel to change the visible month. Obviously future dates are not allowed.
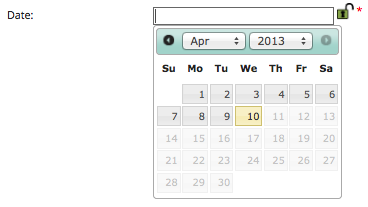
So, click on today’s date to set the date for the record.
The Recorder Name field has already been filled in with our name as a default value, so the next piece of information we must provide for our minimalistic record is the species name. Click in the box next to the Species label. Start typing the first few characters of a species name, e.g. “blueb” to search for Bluebell, Hyacinthoides non-scripta. The list of possible matched species names appears below the input box:
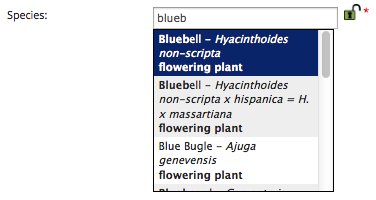
If the species you are looking for has come to the top of the box then simply press return to select it, or you can use the arrow keys to navigate in the list then press return when the species you want is highlighted.
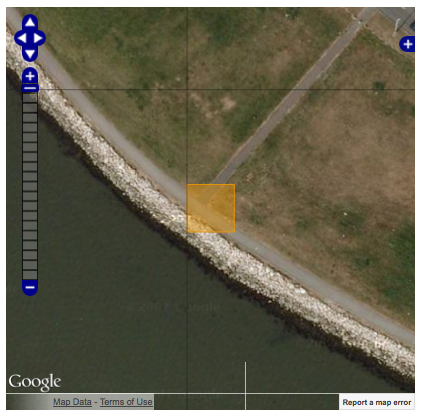
The final piece of information we need to provide for our record is some information on the place, such as a grid reference. There are several ways to do this, but the quickest is to scroll down the page till you can see the map, then move the mouse over the map to the general area of the record. As you hover over the map, you can see a dotted outline of the grid square which you are currently over informing you where the grid square will be set when you click. Don’t worry about making it too precise at this stage - simply click on the map in the approximate location of the record. The map will now zoom in so that you can click again to set a more precise grid reference. Repeat this until your grid reference is placed to an appropriate level of precision. A 10m grid square is a good aim.
Note
We’ll learn about repeat recording at sites as well as how to increase the grid reference precision to 1m later.
Finally, click the Submit button to save your record.
![]()
Project Versions
RTD Search
Full-text doc search.
Previous topic
Tutorial - Using Training Mode in iRecord