Tutorial - Exploring Records
Now we’ve got to grips with the contents of the Explore menu, let’s take a guided tour which will take in some more details. Before following this tutorial through, please visit your My Account page, then go to the Edit tab and Preferences sub-tab. Change your Location to Dorset. You can change it back again afterwards but this way you will be able to follow through the steps with roughly the same records. Whilst you are doing this, uncheck the Training checkbox if it is currently checked so that we can see real records.
Now, go to Explore > All Records. Untick the My species groups only? checkbox above the map and click the Filter button. Your map should look like this:
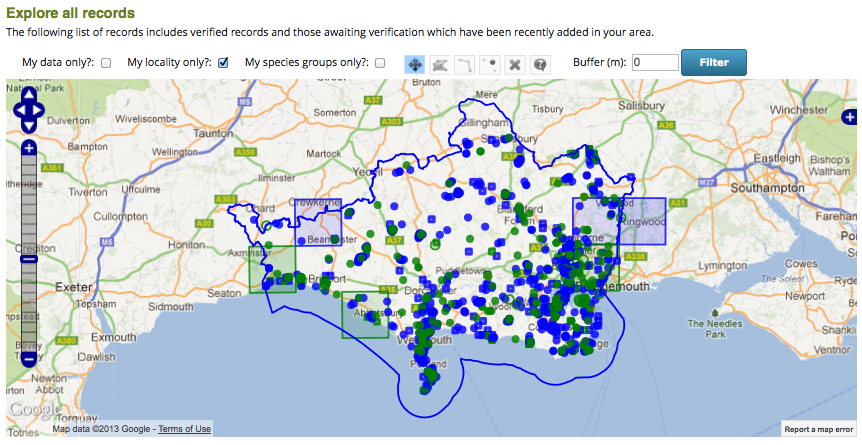
It’s kind of all very pretty, but not much use at the moment as it’s just a jumble of different species dots. So, what can we do with this?
Filter the records table
The table of records below includes quite useful filtering facilities including wildcard searches. Lets draw a map of records of the Silver Y moth (Autographa gamma). To do this you could type the latin name in the box a the top of the Species column, or use a wildcard to search for the common name. So, type “silver y” into this box and press the return key:
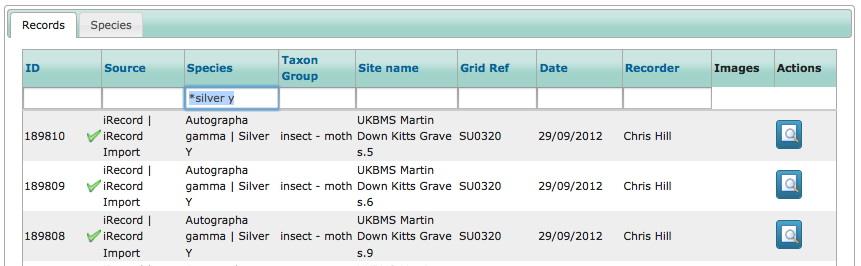
You can see that not only has the grid filtered, but so has the map.
Drilling between the map and records table
Try clicking on one of the rows in the grid and watch what happens on the map. You should see that the record is highlighted for you.
Next, double click on the same row in the grid. The map will zoom in to show you the records. Use the layer switcher button in the top right of the map to switch to satellite view:
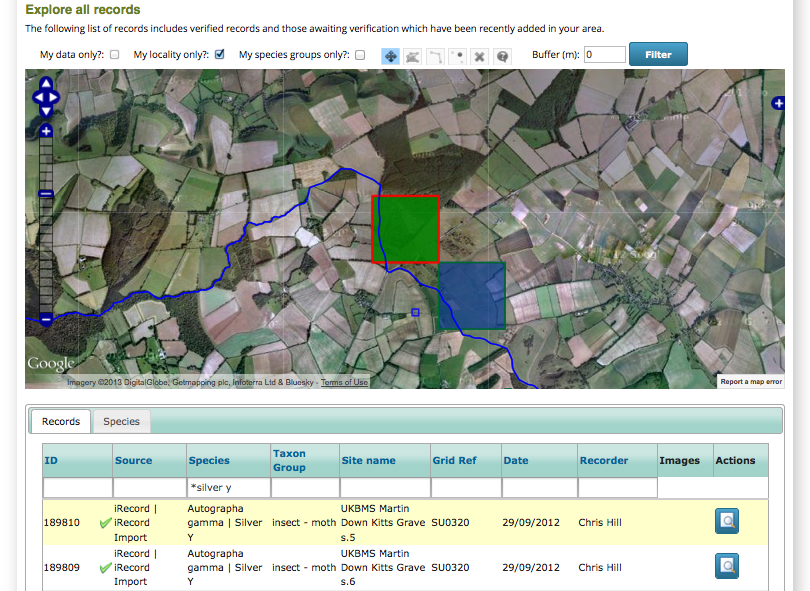
There are other dots on this map which I’d like to know more about. So, select the map query tool - that’s the blue highlighted button with a question mark in it in the following image:

Now, click on one of the dots on the map you are interested in. Not only does the dot highlight, but the grid is refiltered to show just the records under the dot.
Tip
You can also drag a rectangle to select multiple grid squares to filter on.
So, you can quite easily find any record you see on the map in the grid, or find any record you see in the grid on the map.
Exploring by species
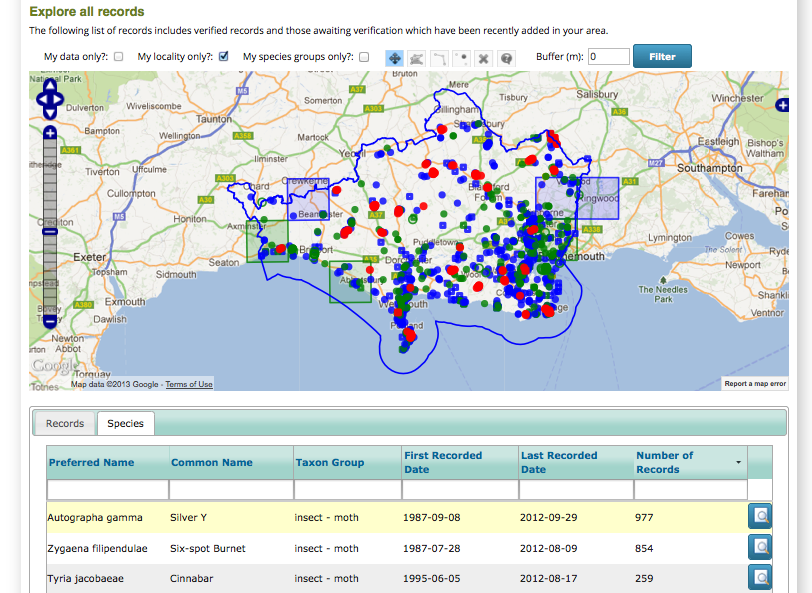
Reload the page to start afresh again and make sure that the My species groups? filter is turned off as before. This time, click on the Species tab in the data panel to view the list of species. Here are a few things you can experiment with:
Click on the Number of Records column title to sort by record count, then click again to put the highest count at the top.
Click once in the first row of the grid. This highlights all records of that species on the map. Try clicking in the different rows to see the map update:
Click on the Species Summary button for the same row in the list of species. This is the button to the right of the row with a magnifying glass icon. This will take you to a details page for that species.
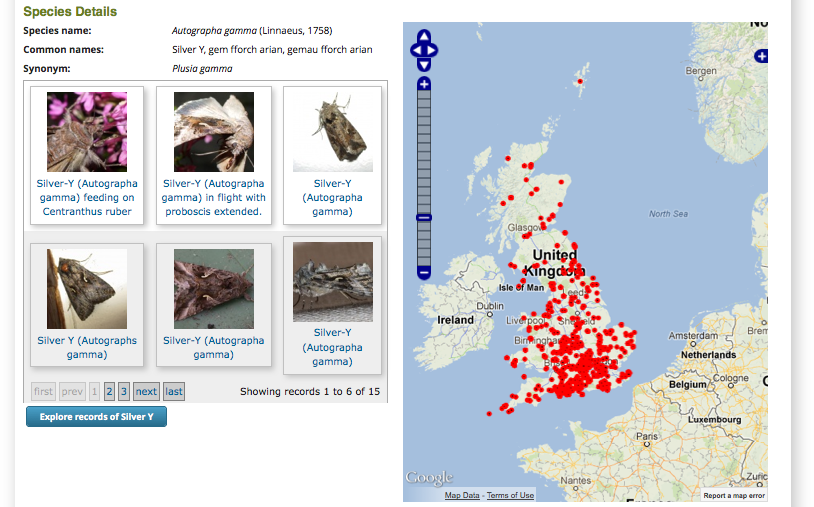
Click on the Explore Records of Silver Y button (assuming that is the species you are viewing details for). This takes you back to the Explore page with all records of that species loaded.
Record tools
For each record shown on the Explore page data tables, there are potentially up to 2 “tools” available in the rightmost column in the grid:
- All records have a magnifying glass icon which zooms in to show you the details of a record.
- Records which you have entered yourself have an edit icon which returns you to the original data entry form for the record. Note that if you edit a record that has been verified, or is part of a form submission that contains records which have been verified, then these records will need to be reverified to check they remain accurate. So don’t edit records that have been verified unless there is a good reason to do so.
Tip
The record details page lets you add a comment to the record which will be sent back to the recorder. For example you might like to let them know if you agree or disagree with an identification.
To round this tutorial off, see if you can find the record of the queen Bombus terrestris you entered earlier and edit it to change the grid reference. A hint - because this record was entered in training mode, you will have to set training mode on your My Account page.
![]()
Project Versions
RTD Search
Full-text doc search.