Tutorial - My Sites
The My Sites facility in iRecord is a great way to keep a personal list of sites you regularly record at. You can also add sites selected from a standard list of sites to your own personal list, currently the sites available are the National Nature Reserves but other site types may be added in future.
Follow through the steps below to add one of your local recording patches to your account.
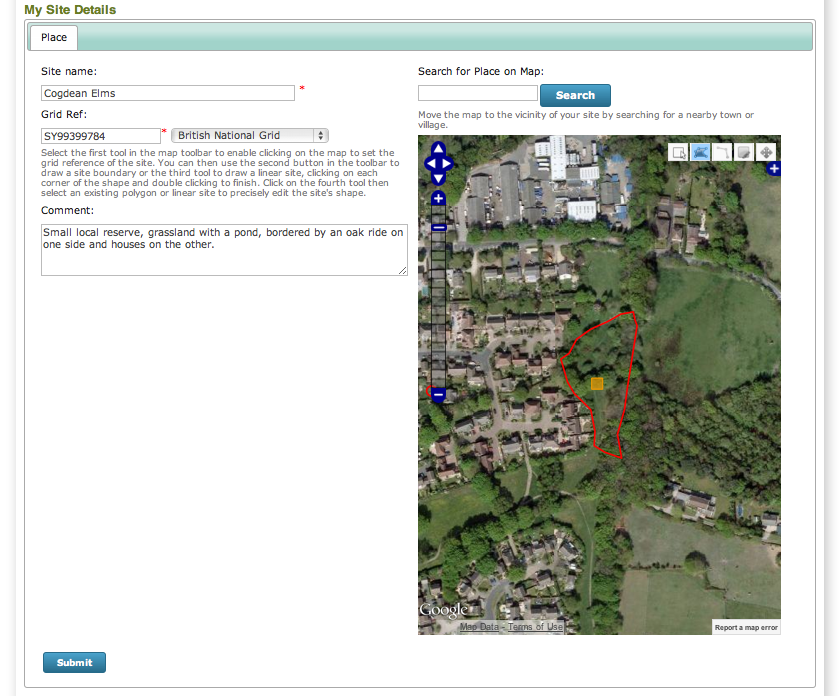
- Select Explore > My Sites from the menu. Click the Create Site button near the bottom of the page to start adding a new site on the Site Details page.
- Enter a name for your site into the Site Name box.
- Use the Search for Place on Map box to search for a nearby town or village. Once you have zoomed the map to the vicinity of your site, use the methods of panning and zooming your map until the map includes all of your site boundary.
- Select the leftmost tool in the row of toolbuttons at the top of the map. This tool lets you specify the centre grid reference of your site. Click once on your site’s approximate centre to set this.
- Specify a comment for your site to describe it.
- Using the map layer panel, switch to Google Satellite as your base layer.
- Since our site is a polygon (it could be a linear site), choose the next tool to the right which is the draw polygon tool.
- Now, click once on the map on a corner of your site. Work your way around the site boundary, clicking once for each change in direction of the site boundary to gradually build up the shape of your site. Double click to finish once you have completed the boundary.
My site details form now looks like the following:
Press the Submit button to complete the site creation process. Now, let’s try adding a casual record for our patch. Make sure that your account is in training mode before going any further!
Select Record > Enter a casual record on the menu.
Set a record for today’s date and choose any species you would like to record.
In the Location box, type the first few characters of the name of the site you just created. iRecord will search against your list of sites and find the matches. When the site name appears, select it. iRecord will zoom the map straight in to show the site boundary for you.
Click once on the map to set the grid reference, zooming in further first if necessary.
Set the Habitat as appropriate for your record. Note that this value will be remembered for you the next time you record at this site.
Save the record.
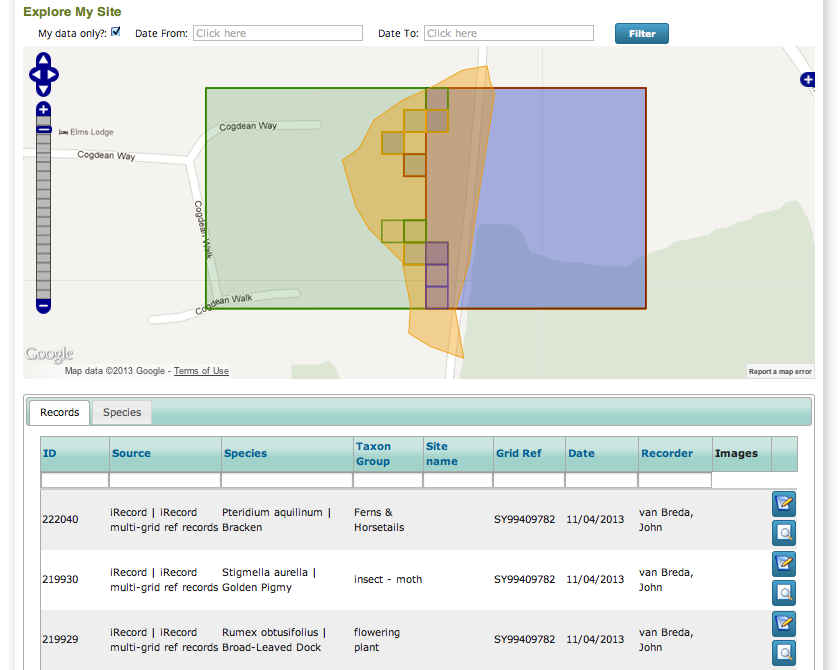
Go back to the Explore > My Sites page. This time, click the Explore button beside your site. This takes you to the explore page, filtered to show your records from that site. Because I’m cheating and have already recorded lots of records at my patch, here’s a screenshot of the site I created:
Tip
You can use the date filters at the top of this page to filter the records by date. I’ve set myself a target of 365 species records in my garden for 2013, so I can use this to check on my progress easily. I’m woefully behind!
![]()
Project Versions
RTD Search
Full-text doc search.